Categories
- Curriculum:
- Age/Grade:
- Subject:
- Materials:
- Institution: School of Visual Arts
- Location: New York, New York
- Duration: 2 - 3 Classes
Description
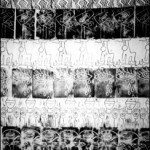
Using Haring's Subway drawings as a starting point, New York City high school student will create prints of their own personal symbols.
Objective
Students will interpret the work of Keith Haring.
Students will discover that different students have different interpretations of the same symbols.
Students will develop a series of prints bases on a personally relevant symbol or combination of symbols.
Resources
The art work of Keith Haring, concentrating on his Subway Series.
Materials
Pencils
Paper
Printing ink
Styrofoam trays
Brayers
Tracing paper
Procedure
MOTIVATION
Begin the discussions by asking students to make observations about the artworks they see. After some general observations have been made, encourage the students to point out and examine the symbols in the work, making assumptions about their possible meaning. Have them explain why.
KEY QUESTIONS
What symbols does this artist use in his work? What do you think the symbols mean? How does color influence the meaning of a symbol? What else can influence a symbols meaning?
PRESENTATION
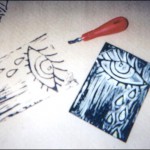
Have the students come up with symbol to represent themselves or their interest. Have them begin by drawing out their ideas on paper. When they have created symbols that they are satisfied with, then draw the symbol into the Styrofoam plate. Have them think about the colors they are going to use to print their symbol.
MODELING
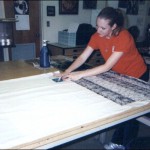
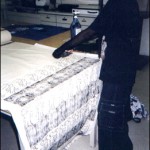
Demonstrate the Styrofoam plate printing procedure. Inform the students that their prints with be a mirror reflection of their drawing. This is important if the students want to write words into their image. Show how much ink to use, how to roll the ink with the brayer until the ink has become tacky, and then how to apply the ink by rolling over the Styrofoam plate. Have the students create a series of prints, which they explore a range of color.
EXPLORATION
If the students want to experiment, they can create smaller Styrofoam plate and juxtapose another image over the first print. Also show the students how to two color onto the same plate. Encourage experimentation.
CLOSURE
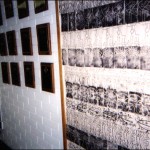
Have the students hang up their series of work and explain which of their prints is the strongest. See if the rest of the students agree or disagree.
ASSESSMENT
Assessment will be judged on closure discussion when the students justify which print is the strongest based on how it was printed or the color they used.
REINFORCEMENT
If the students are having trouble coming up with ideas for symbols just have them tell you about what they draw in their notebooks. Usually, what students doodle in their notebook are very symbolic and can be the prefect subject for this project. Students can also represent what they are interested in, like sports or what they do with their friends.
Extensions
The author of this lesson, Deidre Kenna, a Masters in Art Education student of the School of Visual Arts in NYC, is the 2003-2004 scholarship recipient of the Keith Haring Scholarship award. This project is a collaboration with The School of Visual Arts & a local NYC public high school.
To find out more about The Keith Haring Foundation Scholarship offered through the School of Visual Arts, please contact: Director, School of Visual Arts/Visual Arts Foundation, 15 Gramercy Park South, NYC 10003 or SVA's web site.