Categories
- Curriculum: Art | Social Studies
- Age/Grade: Elementary 3 | Middle School
- Subject: Sculpture
- Materials: Mixed Media | Clay
- Institution: Academia Cotopaxi
- Location: Quito, Equador
- Duration:
Description
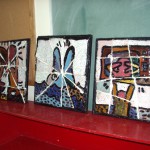
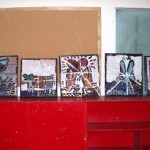
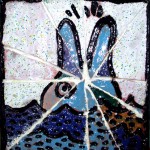
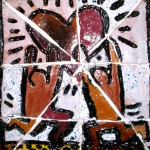
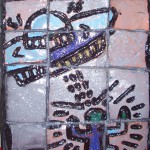
4th and 5th graders from Equador learned about Keith Haring and clay techniques. They put all their knowledge together and made Haring style Mosaics.
Objective
To learn about the artist, Keith Haring.
To learn clay techniques.
Resources
haringkids.com
Photographs of Keith Haring working
Photographs of Haring's artwork
Black and White line drawings of Haring's work
Materials
Clay
Glaze
Plywood
Cement
Grout
Sealant
Procedure
Procedure
CLASS ONE
1. I printed out 6 simple Keith Haring pictures and cut them into pieces. I blew each piecce up 200x on the copying machine. Each child was given a piece and shown where it fit into the whole.
2. The class rolled out slabs and traced around their piece to get the correct shape.
CLASS TWO
1. The kids traced the lines by pressing on the paper which was on top of their clay slab.
2. Next, they used clay tools to carve out the lines.
CLASS THREE
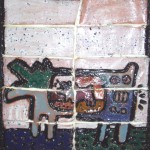
1. After letting the clay dry and bisque firing, the students glazed their tiles. Each whole piece had a specific background color, and the students were told to use either cool or warm colors for the rest-- depending upon what part they had.
CLASS FOUR
1. After glaze firing, the students "put the puzzles together" and volunteer parents cemented the pieces to the plywood.
CLASS FIVE
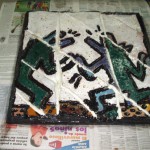
1. Students were shown how to mix and apply grout, this was done in small groups with volunteer parents.
CLASS SIX
1. Students were divided into groups and added a black grout "frame" around each finished piece.