Categories
- Curriculum: Art | Art Criticism | Computer | Language Arts
- Age/Grade: Early Childhood | Elementary 1 | Elementary 2 | Elementary 3 | Middle School | Above 14
- Subject: Drawing | Film | Writing | Analysis and Theory
- Materials: Mixed Media | Paint | Markers
- Institution: The Keith Haring Foundation
- Location: New York, New York
- Duration: 2 - 3 Classes
Description
This spontaneous explorative project allows students of all ages to open up and make free associations with positive results.
Objective
To teach students about Keith Haring and his series, The Story of Red and Blue
To help students learn about color principals and brush techniques.
To limit material choices in an effort to expand creative decisions.
To build students' self-esteem by helping them to recognize the limitlessness of their creative expression and interpretations.
Resources
The Story of Red and Blue WRITING LESSON
Materials
Computers or computer print-outs of the Red and Blue series
Paint (choose only two colors)
Painting supplies
Paper (lightweight)
Paper (choose a nice, absorbant, super white one if possible)
Thick black permanent markers
Procedure
INTRODUCTION
Give students a brief background on Keith Haring and some of the other work he created during his lifetime. Then take students through The Story of Red and Blue section on haringkids.com. Print out the series if it is difficult to for everyone to see the work at once. First talk about one work from the collection, examining it closely. Interpret with the class what that particular work might mean for them, and then, for the artist. Next show the class the rest of the series. Does the meaning of the first work you examined take on a new meaning? Talk about what makes a 'series' and how a grouping of work might affect the interpretation a viewer might have when looking at it. Discuss how and why Haring might have made this series, investigating his motivations. Finally, explore with the class how the body of work makes students feel. What their favorite pieces are, why... For homework have students write their own creative story for The Story of Red and Blue. (refer to our Red and Blue writing lesson).
STEP 1
Choose two different colors of paint. Obviously, Keith used Red & Blue, 2 primary colors, but this is just a starting point to take off from, please feel free to use what inspires you most, just as he did. One suggestion is that Primary colors (red, yellow, blue) have the most impact when mixed, as they create Secondary colors (orange, greeen, purple).
STEP 2
Hand out one of the 2 colors of paint, brushes and lightweight paper. The teacher can hang their paper in front of the chalkboard to work along with students. Explore different brush strokes- all dry- Heavy paint, medium paint, light paint, lines and squiggles- fast, slow, nervous, happy, tired..., different techniques with the brush- dots and blots, twirling, scraping..., Then introduce cups of water to each student. Have them explore different ways the water affects the paint and strokes each person makes- holding up some good examples for the rest of the class to see. Try wetting a section of the paper and then painting lightly over it with a watery brush- what happens? Use several pieces of lightweight paper if students use up all of their space, as they should not feel limited. Now have the students combine some paint density qualities with paint line, brush, and transparency qualities on heavier paper. Give them aprox. 3 sheets each and remind them of all of the different qualities they've learned. On each paper they are to make a special, unique shape or stroke using those qualities. They are not to take up the whole paper with paint, but should move on to the next piece of paper once their shape/stroke is complete.
STEP 3
Now introduce the next color (removing the first color introduced before putting out the new color) by offering 3 heavyweight sheets of paper to each student and reminding them to explore paint density, transparency, line, and stroke. Reintroduce the first color and provide students with another piece of lightweight paper. Have them mix light and dark shades, well mixed, and still twirled colors. After they feel comfortable, give them their last 3 sheets of heavyweight paper to include the paint qualities they've learned along with the new mixing techniques to produce 3 interesting and different shapes or strokes. Let these paintings dry.
STEP 4
Hand out the dried paintings and ask the students who would like to share one of their works with the class that they are especially proud of. Invite a few students up to the front to show their work. Now the rest of the class will get the opportunity to raise their hand and tell the artist what they think their shape is. The artist will call on students, and may be asked to turn their artwork in another direction. Help create a dialogue amongst the students that stimulates more than one idea for children to run with- raise lots of possibilities.
STEP 5
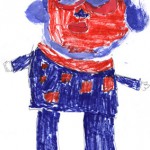
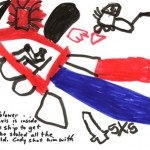
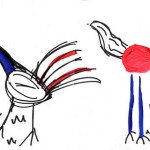
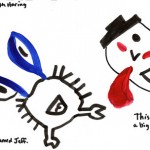
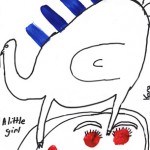
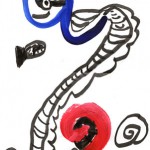
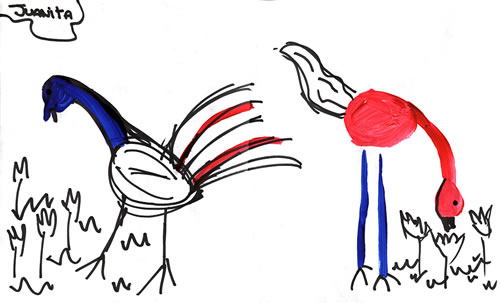
Before handing out the markers, have students put their paintings in an order they would like to work on, resting the extra works neatly on the floor beside them. Stress the importance of really looking at their work before they begin each piece to "hear" what the picture has to say, since many times the work will tell each student's imagination, secretly of course, what their picture is. Remind the students all about the qualities they learned with paint and how some of those qualities can also be made with a marker. Now have a special minute where no one talks and everybody "listens" to their first painting, when the minute is up, remind them that they must take a moment to "listen" to each work before beginning their next drawing. Hand out the markers so they may draw on top of their paintings and make them complete works, just as Keith Haring did in The Story of Red and Blue!
If you feel students are racing to finish when using the markers, consider holding on to their work and giving them one piece at a time to focus on.
STEP 6
After completing the work, have different children come up and share their piece. Allow them to tell the class about one of their works. Then hold up all of their work- the series. Discuss how the works change when part of a group.
Questions
What did you learn about Keith Haring during this lesson?
What did you learn about paint from this lesson?
What did you learn about color from this lesson?
How does it feel to make a 'series' of work as opposed to just one piece?
Go back to the beginning of the lesson where you discussed Haring's motivations for creating The Story of Red and Blue. Does anyone have any new ideas on why he might have made this work and what he was saying through it?
How does this kind of art differ from drawing something you see in the world? Where are you drawing from instead?
How did you feel while you were making this work? How do you feel looking at the finished product?
Extensions
We have created this lesson as an outline, please feel comfortable modifying it to suit your needs, time, and budget.
Younger children can use their fingers, and brush techniques would be revised to finger painting techniques.
For elementary school onward, this is a great project to help develp story telling skills and understanding through narrative, or linear systems, as a result, this lesson is especially successful for children who are great at art but may have more difficulty at reading and writing.
For older children, this is a fantastic way to begin truly investigating color theory and the complexities of painting.
Hang up the work in the hall, with the lesson, and the Haring work used as influence. It's always nice to share the results as well as the process!
